How to Use a Meat Thermometer: Step-by-Step Guide for First-Time Grillers
This comprehensive guide teaches first-time grillers how to properly use meat thermometers for perfect results. The article covers different thermometer types, proper placement techniques, target temperatures for various meats, common mistakes to avoid, and practical applications for different grilling scenarios. The TITAN GRILLERS meat thermometer is naturally incorporated as a recommended tool, with links to the Amazon product page. The content is educational, engaging, and provides real value while establishing authority in the grilling space.

Insert the probe into the thickest part of the meat, away from bone or fat pockets. Wait for the reading to stabilize — 2–4 seconds for a digital instant-read. Compare to the target temperature for your meat. That's the whole process.
Everything else is knowing the specific details for different cuts, avoiding the mistakes that produce false readings, and understanding when to pull vs. when to wait.
Why Temperature Matters More Than Appearance
Color is not a reliable indicator of doneness. Pork can be fully cooked and still slightly pink. Chicken can look done on the outside while the interior is still 10°F below safe. Ground beef can turn brown at 140°F — 20°F below the safe minimum of 160°F.
The only way to know the actual internal temperature is to measure it. Appearance, timing, the poke test, and the ear test are all guesses. A thermometer reads 165°F and that's a fact.
According to the USDA safe minimum internal temperatures, visual checks are insufficient for food safety. These temperatures exist for a reason.
Equipment You Need
| Type | Read Speed | Best For | Price Range |
|---|---|---|---|
| Instant-read digital | 2–4 seconds | Steaks, burgers, chicken, pork chops | $15–$100 |
| Leave-in probe | Continuous monitoring | Long roasts, smoking, whole birds | $40–$150 |
| Dial thermometer | 30 seconds | Bread, candy, old-school cooking | $8–$30 |
For most grillers, an instant-read digital is the one to start with. It handles the most common situations and gives you a reading before your grill temperature drops significantly. Dial thermometers are slower and generally less accurate for meat.
Step-by-Step: How to Use a Meat Thermometer
Step 1: Know Your Target Temperature Before You Start
Decide what temperature you're aiming for before the food hits the grill. Looking it up mid-cook while juggling tongs and a spatula leads to mistakes. Key targets: chicken 165°F, ground beef 160°F, steaks 130–145°F depending on doneness preference, pork chops 145°F, fish 145°F.
Step 2: Calibrate Your Thermometer First
If you haven't verified your thermometer's accuracy recently, do it now. Ice water should read 32°F (±2°F). A 5°F reading error is invisible until it matters. New thermometers should always be checked on arrival.
Step 3: Find the Right Insertion Point
Identify the thickest part of the meat. This is where temperature will be lowest — it's the last point to reach your target. Avoid bone: bone conducts heat faster than muscle and will give a falsely high reading. Avoid fat pockets: fat heats faster than muscle and will also read high.
For steaks, insert from the side so the probe tip ends up in the center, not reading a surface temperature. For a whole chicken, the probe goes into the innermost thigh, not touching bone.
Step 4: Insert the Probe to the Right Depth
The sensing element in most digital thermometers is at or near the probe tip — typically the first 1/2 inch. The tip needs to be in the center of the thickest part, not near the surface.
For a 1.5-inch steak, insert from the side until the probe tip is roughly in the geometric center. For a thick roast, insert until you're 2–3 inches from the surface on the fattest side.
Step 5: Wait for the Reading to Stabilize
For instant-read digital thermometers: 2–4 seconds is typical, but wait until the display stops changing. Some units display a "ready" indicator. Don't read too early — a reading that's still rising isn't the final temperature.
For dial thermometers: 30 seconds minimum. They're significantly slower and people consistently read them too early.
Step 6: Read and Decide
Compare the reading to your target. If you're under, leave the food on heat. If you're at or past target, pull it — and account for carryover cooking. Most whole cuts will rise 5°F after removal; large roasts rise 10–15°F. Pull before you hit the target, not after.
Step 7: Clean the Probe After Each Use
Wipe the probe with a clean cloth or paper towel after each insertion. Cross-contamination — carrying bacteria from raw chicken to cooked pork — happens when you skip this step. In between checking different meats, clean the probe.
Where to Probe Each Type of Meat
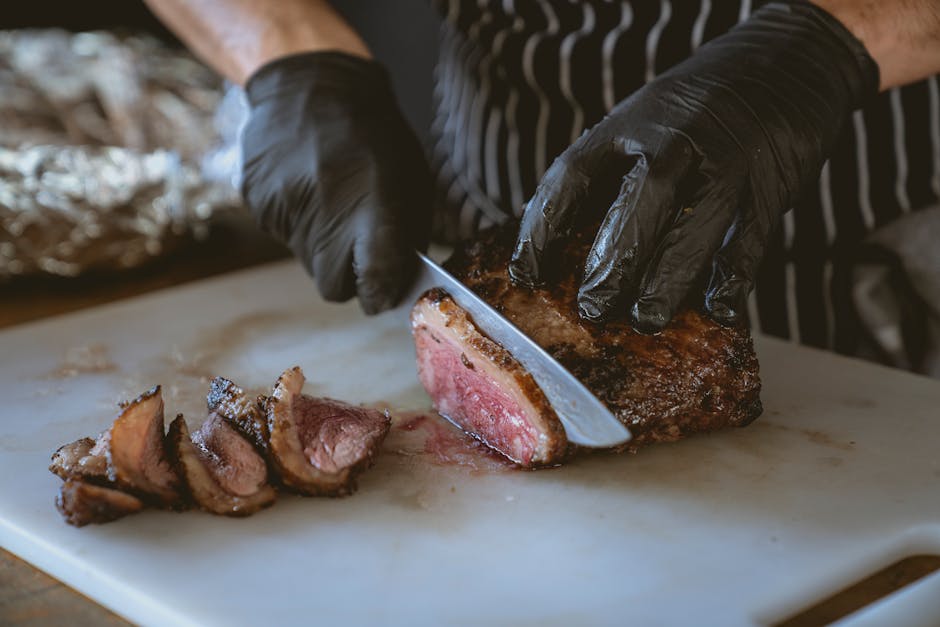
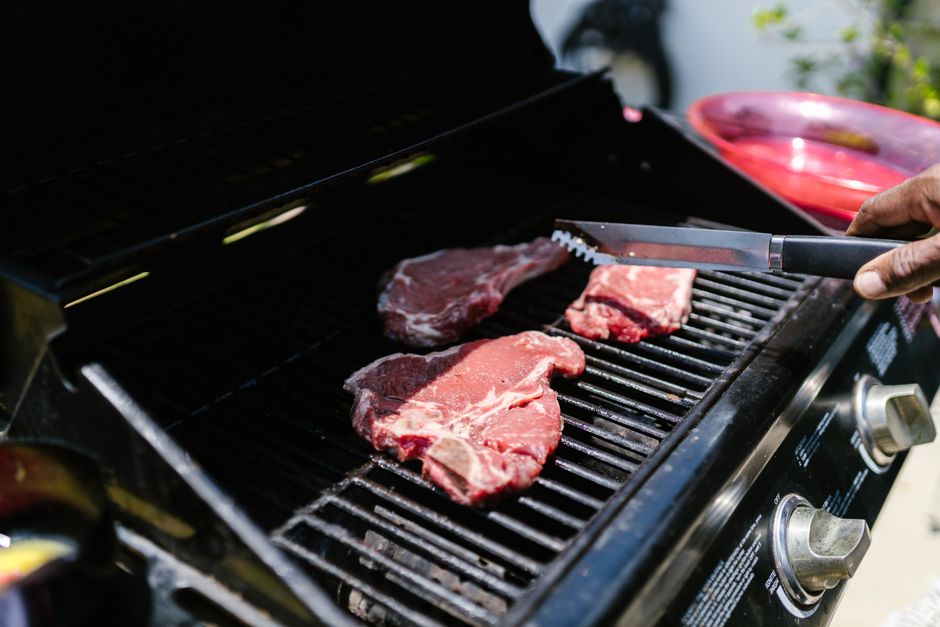
Steaks and Chops
Insert the probe from the side of the steak (not the top) so it reaches the center. Insert at a shallow angle — almost horizontal — to avoid reading the cooler outer layers. For a 1-inch steak, the probe tip should be about 1/2 inch from the center.
Target: 125–145°F depending on doneness preference. USDA minimum for whole cuts: 145°F with 3-minute rest.
Whole Chicken
Two probe points: the innermost thigh (not touching the thigh bone) and the thickest part of the breast. The thigh needs to reach 165°F and is usually the last to get there. Don't serve until both spots read 165°F.
Use the chicken temperature guide for a detailed breakdown by cut and cooking method.
Chicken Pieces (Breasts, Thighs, Drumsticks)
Insert into the thickest part, away from bone. Bone reads hot — a reading near bone will be 10–15°F higher than the actual muscle temperature. Pull the probe a little if you suspect you're near bone, reinsert at a slightly different angle.
Burgers and Ground Meat Patties
Insert from the side of the patty so the probe tip reaches the center. For a 3/4-inch thick burger, the probe tip should be in the dead center. Ground beef minimum: 160°F — no exceptions, because bacteria is distributed throughout.
Whole Turkey
Check three spots: innermost thigh (both sides), thickest part of the breast. The thigh is typically the last to reach 165°F. Once all spots read 165°F, you're done. The turkey can rise another 10–15°F after removal — pull at 155–160°F and let it rest 20–30 minutes under tented foil.
Brisket and Pork Shoulder
For these long cooks, you have two temperature targets: the safety floor (145°F) and the texture target (195–205°F for brisket, 200–205°F for pulled pork). Insert the probe into the thickest part of the flat (for brisket) or the center of the shoulder, avoiding the bone.
Plan times using the brisket cook time calculator or pork shoulder cook time calculator — these slow cooks benefit from time estimates before you start.
Fish Fillets
Insert horizontally into the thickest part of the fillet. Fish cooks fast and the window between done and overdone is narrow — check early, around the 80% mark of expected cook time. Target: 145°F for safety, 125–135°F for most restaurant-style preparations.

Common Mistakes
Probing from the Top (Instead of the Side)
Inserting the probe straight down from the top on a steak or burger means the probe travels through the hot outer layers before reaching the center. You're getting an average of surface and center temperature, which reads higher than the actual center. Always probe from the side for flat cuts.
Probing Near Bone
Bone conducts heat differently than meat — it reads significantly hotter. A reading near bone will show a temperature 10–15°F higher than the actual muscle temperature. If your first reading seems unusually high, pull back slightly and reinsert away from bone.
Pulling the Probe Too Early
Reading an instant-read thermometer before it stabilizes gives a false low reading. For most units, the display stops changing or shows a "done" indicator when stable. Wait for it. This takes 2–4 seconds, not 1 second.
Not Accounting for Carryover
Pulling a steak at 130°F when you want 130°F results in a 135°F steak after resting. Pull 5°F below your target serving temperature for most cuts, 10–15°F below for large roasts and whole birds.
Using the Same Probe on Different Meats Without Cleaning
This is cross-contamination. Raw chicken juices on the probe, then probing cooked pork. The cooked pork picks up bacteria from the raw chicken. Clean the probe between checks on different cuts.
Pro Tips
Check Multiple Spots
A whole chicken, large roast, or thick brisket will have temperature variation throughout. The thickest point is the last to reach temperature. Check multiple locations — serve when the coldest spot hits target, not the hottest.
For Smoking: Use a Leave-In Probe
Opening a smoker repeatedly to check temperature with an instant-read adds 10–15 minutes of recovery time per opening over a 12-hour cook. That's potentially hours of extra time. A leave-in probe with an external display solves this without touching the smoker.
Don't Trust Color Alone
Carbon monoxide from smoking can create a "smoke ring" — a pink band near the surface of cooked meat that looks like undercooking. It's not. Smoked pork shoulder will have a pink color at 200°F. Temperature is the only reliable check.
Calibrate Regularly
Check your thermometer in ice water (32°F) before any important cook. A 5°F drift happens slowly — you won't notice it until you're consistently over or under your targets.
FAQ
How deep should I insert the probe?
The sensing element in most instant-read thermometers is at or within 1/2 inch of the probe tip. Insert until the tip is in the center of the thickest part of the cut. For a 1.5-inch steak, that's roughly 3/4 inch deep from the side. For a thick roast, 2–3 inches into the center from the thickest edge.
Why does my thermometer give different readings in the same piece of meat?
Because the temperature varies throughout the meat — this is normal. The surface is hotter; the center is cooler. The interior near bone is hotter than the muscle away from bone. These variations can be 10–20°F on a whole chicken. Check the thickest part, away from bone, for the most relevant reading.
How do I know if my thermometer is accurate?
Test it in ice water: fill a glass with crushed ice and cold water, stir, insert the probe, and wait 15–20 seconds. A properly calibrated thermometer reads 32°F (±2°F). If yours reads 35°F or 28°F, either calibrate it or account for the offset mentally.
Can I leave the thermometer probe in while the meat cooks?
Only if it's a leave-in probe thermometer designed for that purpose. Instant-read thermometers are not designed for sustained oven exposure — the probe seals and electronics aren't rated for hours at cooking temperatures. Use a dedicated leave-in probe for anything over 30 minutes of continuous cooking.
Should I check temperature before or after resting?
Before resting — that's when you make the pull decision. If you pull at 130°F for a steak, the temperature will rise to about 135°F during the rest. The final temperature after resting is what you eat. Check before resting, account for carryover, pull early.
Do I need to sanitize the thermometer probe between uses?
At a minimum, wipe it clean between insertions into different meats. For serious sanitation — raw poultry followed by anything else — use hot soapy water or an alcohol wipe. At a cookout with multiple meats, have a small bowl of hot water and a clean towel near the grill for quick wipes.
Recommended by Titan Grillers
IP67 Waterproof Digital Meat Thermometer
Reads in 2–3 seconds · Backlit LCD · Built-in magnet · Free returns
Free BBQ Calculators
Use our free tools to nail your cook times, temperatures, and quantities every time.
You Might Also Like


Join the Grill Masters Club
Get exclusive recipes, techniques and special offers on our premium meat thermometers.