How to Start Grilling for Beginners: Complete Guide
This comprehensive guide for beginner grillers covers everything from choosing the right grill (charcoal vs. gas) to mastering basic techniques and troubleshooting common issues. The article includes sections on essential tools, temperature control, food safety, and maintenance, with special emphasis on the importance of using a quality meat thermometer. Throughout the guide, TITAN GRILLERS products are naturally integrated along with relevant links to additional resources on thermometer usage and maintenance.

Start with burgers or chicken thighs, not steaks. Burgers and thighs are forgiving — they're inexpensive, cook in 15–20 minutes, and the acceptable temperature range is wide enough that beginner errors don't ruin the meal. Once you've cooked those 5–6 times and have a feel for your grill, steaks are the logical next step. Jumping straight to a $40 ribeye on your first cook is setting yourself up for an expensive learning experience.
Why Grilling Works (Even for Beginners)
Grilling is more forgiving than oven cooking or stovetop cooking in one specific way: the direct visual and sensory feedback is immediate. You can see the color, hear the sizzle change as moisture cooks off, and smell the difference between raw meat juice and rendered fat. That feedback loop trains your instincts faster than any other cooking method.
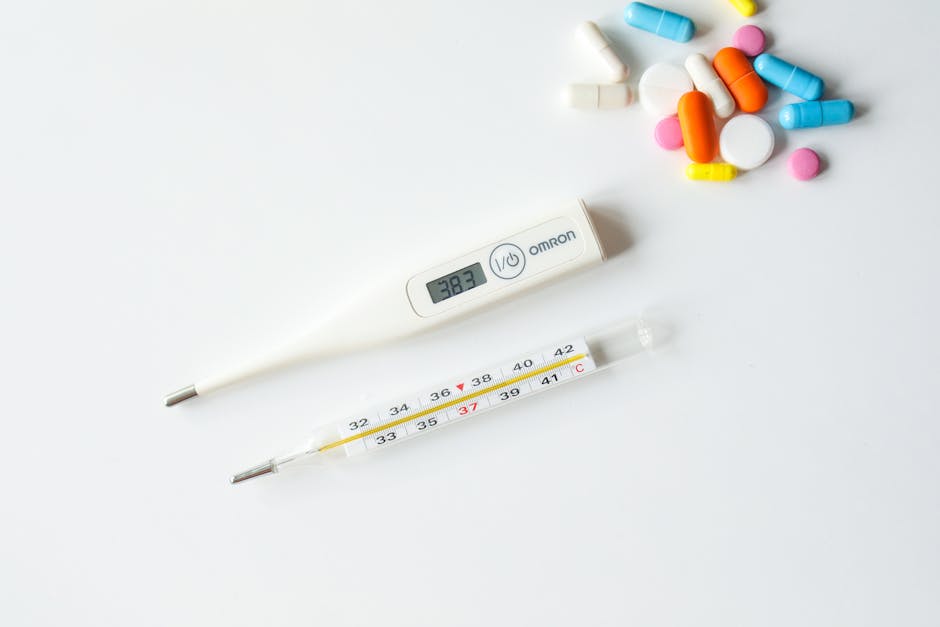
The temperature part is where beginners get in trouble. Color is not a reliable doneness indicator. Ground beef can look brown at 140°F (safe) or at 155°F (fully safe) — you can't reliably distinguish those by color. Chicken can look fully cooked at 155°F (unsafe) and still be pink at 165°F (safe). A $15 digital thermometer removes all the guesswork. It's the single most impactful tool you can add to your kit.
Equipment You Need
| Item | What to Buy | Cost | Why It Matters |
|---|---|---|---|
| Grill | Weber Kettle 22" (charcoal) or any 2-burner gas grill | $100–200 | Consistent heat, two-zone setup |
| Instant-read thermometer | ThermoPro TP03 or ThermoPop 2 | $15–34 | The only reliable doneness tool |
| Long-handled tongs | 12-inch stainless, spring-loaded | $10–15 | Safe distance from heat |
| Grill brush | Stiff wire or bristle-free brush | $10–20 | Clean grates prevent sticking |
| Heat-resistant gloves | Silicone or welding gloves | $15–25 | Handles, grates, chimney work |
| Cutting board (dedicated) | Large wood or plastic, for grilled meats only | $15–30 | Cross-contamination prevention |
Charcoal vs. gas: gas is more consistent and beginner-friendly for temperature control. Charcoal produces better flavor and teaches you more about fire management, but has a higher learning curve. Either works — start with whatever you have access to. The Weber Kettle at $100–140 is the best value grill ever made and has been for 50 years. Don't overthink the grill decision.
Step-by-Step: First Cook Setup
Step 1: Set Up Two Zones
Two-zone cooking is the most important concept in grilling. Set up one side of your grill as the "hot zone" (direct heat) and the other as the "cool zone" (indirect heat, no coals or burners beneath). The hot zone sears and chars; the cool zone cooks gently and finishes without burning. This setup lets you start food over high heat for color, then move it to indirect for gentle cooking to the correct internal temperature. Without two zones, you're stuck managing a single temperature for everything — which is much harder.
For charcoal: pile coals on one side of the kettle. For gas: turn one burner on high, leave the other off.
Step 2: Preheat with the Lid Closed
Light your grill and close the lid for 10–15 minutes before cooking. This heats the grates, which prevents sticking. Cold grates pull moisture from the meat surface and cause sticking; hot grates sear on contact and release cleanly after 1–2 minutes. You'll know the grates are hot enough when you can hold your hand 6 inches above the grate for no more than 2 seconds.
Step 3: Clean the Grates
Brush the grates with a wire brush or bristle-free brush while hot, immediately before cooking. Hot grates clean easily; cold grates don't. Then wipe with a folded paper towel held by tongs, lightly dipped in oil — this oils the grates and further reduces sticking.
Step 4: Season the Meat Just Before Cooking
Salt at minimum, 30 minutes before cooking. Oil the meat (not the grates with budget oil — oil the food) to prevent sticking and promote browning. Dry seasonings (rubs, pepper) apply just before cooking. Avoid sugary marinades on the direct heat zone — they burn before the meat is cooked. Use the dry rub calculator for proper seasoning quantities.
Step 5: Don't Move Food Prematurely
Place food on the grates and don't touch it for 2–3 minutes. Food releases from grates naturally when it's ready — if it sticks when you try to flip, it's not ready. Force-flipping tears the surface and costs you a sear. Wait until it releases freely, then flip once.

Your First Steak
Start with a ribeye or NY strip, 1–1.5 inches thick. Bring it to room temperature (30 minutes on the counter). Season generously with salt and pepper. Oil the steak, not the grates.
Sear 3–4 minutes direct heat, flip, 3–4 more minutes direct heat. For a 1.5-inch steak, if the edges are still pink-red after 8 minutes total, move to indirect heat until the thermometer reads 125°F. Rest 5 minutes. Medium-rare arrives at 130–133°F after carryover.
Target temperatures: rare 120–125°F, medium-rare 130–135°F, medium 140–145°F. The temperature guide covers all the targets. Don't press on the steak with a spatula — that squeezes out juice.
Your First Chicken
Boneless thighs are the best beginner chicken. They're fatty enough to tolerate overcooking, cheap enough to learn on, and cook in 12–15 minutes over medium-high heat. Bone-in pieces work too but take longer (20–25 minutes) and require careful two-zone management to prevent burning.
Target: 165°F internal temperature per USDA food safety guidelines. Insert the thermometer into the thickest part, away from bone. For boneless thighs, that's the geometric center. Chicken at 165°F is food-safe and will be juicy if you don't go much above it. Above 180°F, thigh meat dries out noticeably.
Your First Burgers
Use 80/20 ground beef (80% lean, 20% fat). Fat carries flavor and prevents the burger from drying out. Form ¾-inch patties slightly wider than your bun — they shrink 10–15% during cooking. Make a shallow dimple in the center with your thumb to prevent the burger from puffing into a dome shape as it cooks.
4–5 minutes per side over direct heat. Target 160°F internal. Insert the thermometer from the side through the center of the patty. Do not press on the burger with a spatula — that's pure juice loss and a fireworks show of grease flare-ups. Let it cook undisturbed.
Your First Vegetables
Asparagus, corn, zucchini, bell peppers, and onions are the best beginner vegetables. They cook quickly, taste better grilled than any other method, and are nearly impossible to ruin. Toss with olive oil, salt, and pepper. Direct heat, 3–5 minutes per side. No thermometer needed — visual doneness (char marks, tenderness) is sufficient for vegetables.
Common Beginner Mistakes
Cooking over too-high heat the entire time. Maximum heat chars the outside before the inside is done. Start high for searing (2–3 minutes), then move to indirect for finishing. This applies to everything except very thin cuts (thin burgers, chicken strips, vegetables).
Opening the lid constantly. Every time you open the lid, you lose 25–50°F of pit temperature and add time to your cook. Open to flip and check temperature — that's it. The instinct to constantly check is natural and wrong. Trust your timer and thermometer.
Cooking cold meat straight from the fridge. Cold meat (38°F) placed on a hot grill has a larger temperature differential to overcome. The outside overcooks by the time the center reaches temperature. Pull meat from the fridge 20–30 minutes before cooking to take the edge off the chill.
Not resting meat after cooking. Cutting a steak immediately off the grill loses 20–40% more juice than cutting after a 5-minute rest. The juice on your cutting board is not supposed to be there. Rest everything for at least 3–5 minutes.
Flare-ups from grease on burners. Grease dripping onto burners or hot coals causes flare-ups. Move the food to a cooler zone when flare-ups happen — don't try to cook through them. A steak cooked through a 10-second flare-up has charred, bitter spots. Move it, let the flare subside, and return to heat.
Buying cheap, thin-gauge tongs. Cheap tongs flex when you try to grip and turn heavy cuts. A flexible tong drops food back onto the grates. Buy tongs with a firm, spring-loaded grip that can handle a 2-lb brisket flat without flexing.

Pro Tips
Season your grates before the first cook. Heat the grates, brush clean, then rub them with oil and heat for 10 minutes. This polymerizes a thin layer of oil onto the grates — seasoning them like a cast iron pan. Reduces sticking and food buildup over time.
Let the grill do the work. Grilling is mostly waiting. Set up your heat zones, place the food, set a timer, and step back. Constant attention and adjustment creates inconsistent results and increases the chance of error. Trust the process more than your instincts.
Keep a notebook for your first 10 cooks. Note what you cooked, at what heat level, for how long, and what the result was. After 10 cooks, you'll have a personal reference that's more useful than any recipe. Learning your specific grill's hot spots, how it holds temperature, and how different cuts behave takes time — written notes accelerate the process.
FAQ
What should a complete beginner grill first?
Burgers or boneless chicken thighs. They're inexpensive, forgiving of temperature errors, and cook quickly enough to get multiple attempts in one session. After 4–5 successful cooks, move to steaks. After you're comfortable with steaks, try whole chickens. Work up gradually.
Charcoal or gas grill for beginners?
Gas is easier to start and control temperature. Charcoal produces better flavor and teaches fire management skills that transfer to smoking. If you're purely focused on ease of entry, gas is the right choice. If you're interested in BBQ as a longer-term hobby and want to understand fire management, charcoal teaches more. The Weber Kettle at $100–140 is the best value starting point for charcoal.
Do I need a thermometer as a beginner?
Yes — more than any other tool. Color is unreliable for doneness. Timing is unreliable across different cuts, starting temperatures, and grill variations. A $15 thermometer removes all that uncertainty and tells you definitively when the food is done. It's the cheapest, most impactful upgrade a beginner can make.
Why does my food stick to the grill?
Three reasons: grates weren't preheated long enough, grates weren't clean, or food was moved too soon. Hot grates sear meat on contact and release naturally when done; cold grates pull moisture and stick. Wait 10–15 minutes before cooking, brush the grates clean, and don't try to flip food until it releases easily on its own.
What temperature should I grill at?
Direct heat zone: 450–550°F for searing and thin cuts. Indirect heat zone: 300–375°F for finishing and thick cuts. For a basic two-zone setup, high heat one side, medium-low or off the other. Check your grill's built-in thermometer as a rough guide — it reads dome temperature, which runs 20–50°F hotter than grate level. Your instant-read thermometer held 2 inches above the grate gives a more accurate picture.
How do I know when the grill is hot enough?
Hold your hand 6 inches above the grate. If you can hold it there for 1–2 seconds, you're at high heat (~550°F). 3–4 seconds is medium heat (~400°F). 5–6 seconds is medium-low (~325°F). This is a rough guide, not a precise measurement — but it's good enough for beginner grilling until you develop a feel for your grill's output.
Recommended by Titan Grillers
IP67 Waterproof Digital Meat Thermometer
Reads in 2–3 seconds · Backlit LCD · Built-in magnet · Free returns
Free BBQ Calculators
Use our free tools to nail your cook times, temperatures, and quantities every time.
You Might Also Like


Join the Grill Masters Club
Get exclusive recipes, techniques and special offers on our premium meat thermometers.